How to Tap a Sugar Maple Tree and Make Your Own Maple Syrup
Making Your Own Maple Syrup is not impossible, it just requires patience, some knowledge and the right equipment... and tree!
It all starts with the tree
First, let's look at the requirements for the trees.
Which trees can be tapped
While maple syrup can be made from any species of maple tree, the sugar maple has the highest concentration of sugar in the sap. SO, if you can, use sugar maple trees!
Trees that can be tapped include: sugar maples (Acer saccharum) which is also known as the hard maple, rock maple, sweet maple and black maple.Maple syrup can also be made from the sap of red maple and black maple trees. It can even be made from other maple species, such as the Bigleaf Maple in the Pacific Northwest. But instead of about 40 gallons of sugar maple syrup to make 1 gallon of maple syrup, it may require 60 gallons of box elder sap to produce one gallon of syrup.
How much sap will you need
Generally the ratio of sap to syrup for the sugar maple is 40 to 1 (40 gallons of sap yields one gallon of syrup). It is generally recommended that you have at least ten gallons of sap before you start the evaporating process.
What Tools will you need
The tools required for a small maple syrup operation are found in most homes or can be easily obtained. They include:
- Drill (brace) with 7/16" or 3/8" drill bit
- Hammer
- Collection containers - plastic buckets, milk jugs, and coffee cans work well. It is best to use containers that have a cover on them to keep out rain, snow and other forest debris.
- Large boiling pan (preferably low and broad)
- Candy thermometer
- Wool felt or cheesecloth filter material
- Tapping spouts (called spiles) . Spiles can be purchased or made Making Spiles
- You need 1/2 inch (1 cm) diameter " wooden dowels cut to 3 inch (8 cm) lengths.
- Drill a 1/8 inch ( hole through the center of each dowel and taper at one end so the spile will fit snugly into the tree tap hole.A notch should be made on the top of the wide end of the spile to support the sap collection container
How to tap the tree and collect the sap
Timing is everything!
When to Tap Trees
Alternating freeze and thaw temperatures are necessary to create the pressure which causes the sap to flow when the tree is tapped. Sap runs best when temperatures drop below freezing at night and rise into the 40s during the day.
In the upper Midwest of the U.S., these conditions typically occur during the month of March. In new England in may start in early March. But weather conditions vary from year to year, and from one location to another, so trees can sometimes be tapped as early as mid- February or as late as April.
Once temperatures stay above freezing and leaf buds appear, the maple syrup season is over.
How to Tap Trees
To determine the number of taps per tree, (too many taps in a tree may be harmful) use the following chart:
| Tree Diameter | Number of Taps |
| less than 10" | none - tree is too small and will be damaged |
| 10" to 14" | 1 |
| 15" to 19" | 2 |
| 20" to 24" | 3 |
| 25" or larger | 4 |
- Drill a hole in a tree, 2 - 4 feet above the ground.
- The hole should be drilled at a slight upward angle to a depth of about 3 inches.
- Use a hammer to lightly tap the spile into the hole. Do not hammer the spile too far into the hole as it may cause the wood around the hole to split - resulting in lost sap flow.
- Hang a sap container from the spile.
- Empty sap containers once a day
Processing the sap into syrup
To avoid spoilage, mold, damage, insects, etc, you should process sap immediately or store in a cool place out of direct sunlight until you are ready.
To make syrup from maple sap is a simple process of boiling and evaporation. Concentrating the syrup increases the sugar content from approximately 2% to around 66%. This process also darkens the color to its shades of golden brown.Since substantial quantities of water will be "cooked off," most of the boiling should be done outside, historically done over a wood-burning stove; but a propane source allows for more precise control of the temperature and produces far few carbon emissions. A propane turkey fryer is ideal,
- Set up your turkey fryer or other heating apparatus. Make sure you have considered fire safety cleared flammables from the area, dogs, children and animals that could knock things over and have a fire extinguisher handy.
- Pour your sap into a large cooking pan or pot. The wider the pan or pot, the better (so long as it is not a lot larger than your heat source) as a pan with a large surface area will increase the rate of evaporation during the boiling process.
- As the water boils off, add more sap. Take care to add only small amounts of sap at a time to avoid killing the boil.
- Use a candy thermometer attached to the side of the pan to monitor the temperature of the sap. As the sugar in the sap becomes more concentrated, the temperature of the boiling sap will rise.
- When the sap darkens and the bubbles become smaller, you are approaching the final stages of boiling. As you cook the syrup, it will slowly become a light caramel color as it becomes syrup. You must skim any scum off and discard that rises to the surface. In general, a lighter color of the sap means a better the quality of the syrup it will produce.
- At this point, pour the sap into a smaller pan and continue boiling on your indoor stove.
- When the temperature of the sap reaches 219 degrees, the sap has become syrup! It reaches boiling point at 106°C (about 228 degrees Fahrenheit) and is pasteurized at this point but needs to be kept in a sterile container and refrigerated or it will go off. When the temperature of the syrup gets close to boiling point it is a good idea to transfer the large shallow pans into saucepans to finish the syrup on the stove where it can be monitored more closely. It can quite quickly turn to maple candy if you let it get too hot. When cold, any sediment or “sugar sand” can be strained off.
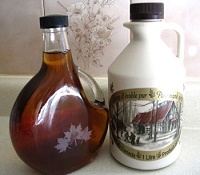
- To finish the syrup making process, strain the hot syrup twice through cheesecloth or felt, pour into jars and refrigerate.
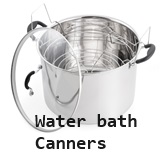
- For longer storage, you can also use mason jars and can the syrup. See this page for how to use a canner! You only need to pour the boiling hot syrup into the clean jars and use a processing time or 10 minutes.
Home Canning: General directions
- Why you should use a canner and how to choose one.
- Summary of approved home food preserving methods
- Canning methods that are considered to be unsafe: steam, microwave, dishwasher, oven, or just sealing the jars without further processing?
- Overview and step by step guide to water bath canning (for acidic foods; jams, jellies, applesauce, fruits)
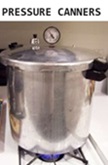
- Overview and Step by step guide to pressure canning (for low acid foods: beans, corn, meats, etc.)
- If you are new to home canning - see these do's, don'ts and tips
- Why shouldn't I just can my own recipe or change these recipes?
- Frequently asked questions about canning
Get the
most recent version of
the Ball Blue Book of Home Canning
Find other types of farms:
- Easter egg hunts
- Children's consignment sales
- Farm markets and roadside stands
- Local Honey
- Local Meat, Milk and Eggs
Maple Syrup Info: - Maple syrup nutrition facts
- Maple syrup production methods and history
- Tapping trees and making your own maple syrup from maple sap
- Maple syrup production facts and figures
- Pumpkin pie from a fresh pumpkin with maple syrup! (wonderful!)
- Maple Syrup Ice cream ( with a gel-canister ice cream maker)
- Maple Syrup Ice Cream (with a ice cream maker that uses ice and salt)
Related: - Road trip and camping
- Pumpkin patches and corn mazes
- Christmas Tree Farms and lots
Highly rated canning supplies:
- Canning accessories kit: funnel, jar tongs, lid lifter, etc
- Food Dehydrator, 400W Electric with 8 Trays, 48 hour Timer and Temperature Control 95-176℉, BPA-Free
- Water Bath Canner, 21 Qts with lid, Jar Rack, Speckled Black, cans 7 quart jars, 9 pint jars or 13 half-pint jars
- Air Fryer: Instant Pot Instant Vortex Plus XL 8QT Clear Windows, Custom Programming, 8-in-1 Functions that Crisps, Broils, Roasts, Dehydrates, Bakes, Reheats
- Pressure canner: All American 921, 21.5qt Pressure Cooker/Canner, never needs gaskets, Great for Gas, Electric or Flat Top Stoves - Made in the USA
- The Backyard Homestead: a guide to homesteading , on 1/4 acre, how to raise grains and vegetables; raise animals for meat, eggs, and dairy; and keep honey bees
- HEPA Air Purifiers for Home, Large Rooms for Allergies, Smoke, Pets. Eliminates 99.97% of Dust, Pet Hair, Odors